
Open JobHandy Administration. API key management requires at least one of these portal permissions: IT, HR, or Company-Admin.
Permission models
Portal permissions and API-key scope are separate controls:
A user who may create a key does not automatically grant that key access to every company. The scope selected during creation is the effective API boundary.
Open API key management
In the administration portal, open IT Settings and select the API Keys tab. The table shows each key’s name, scope, status, creation date, and available actions.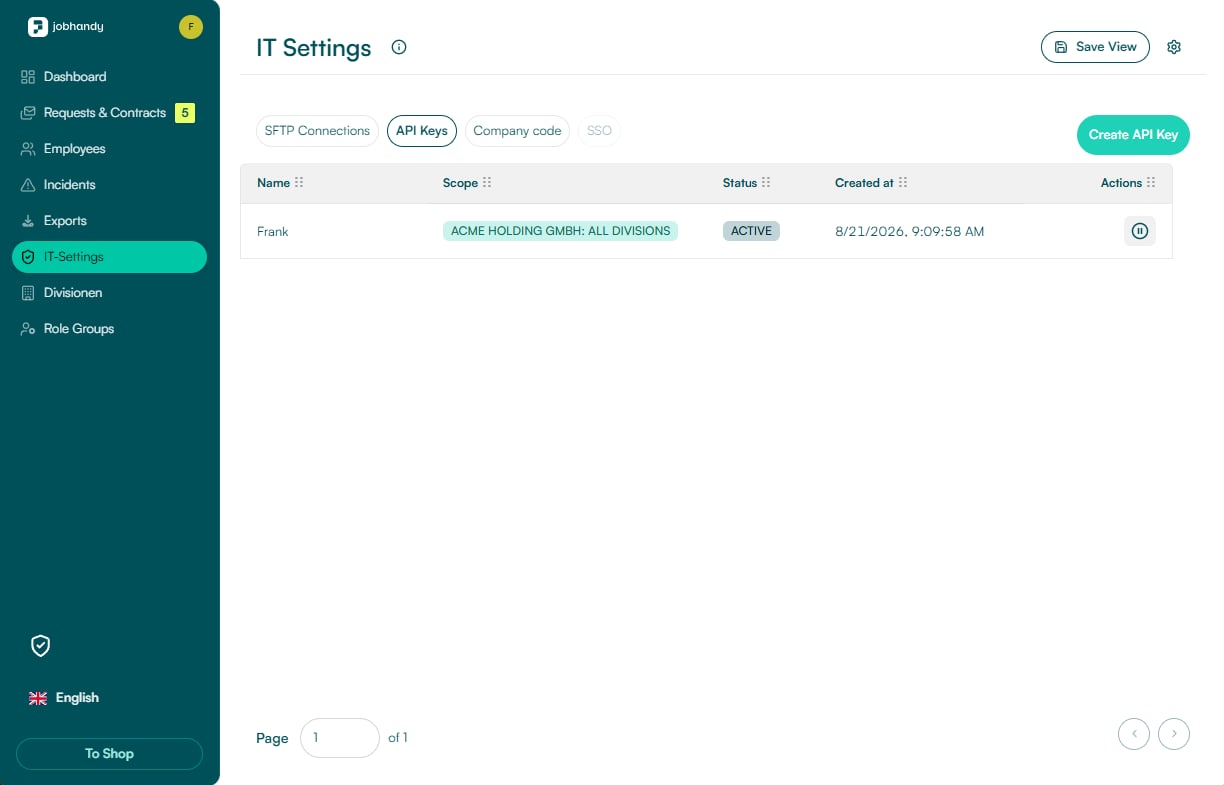
Create an API key
Click Create API Key and enter a descriptive name for the consuming system or integration. Recommended naming pattern: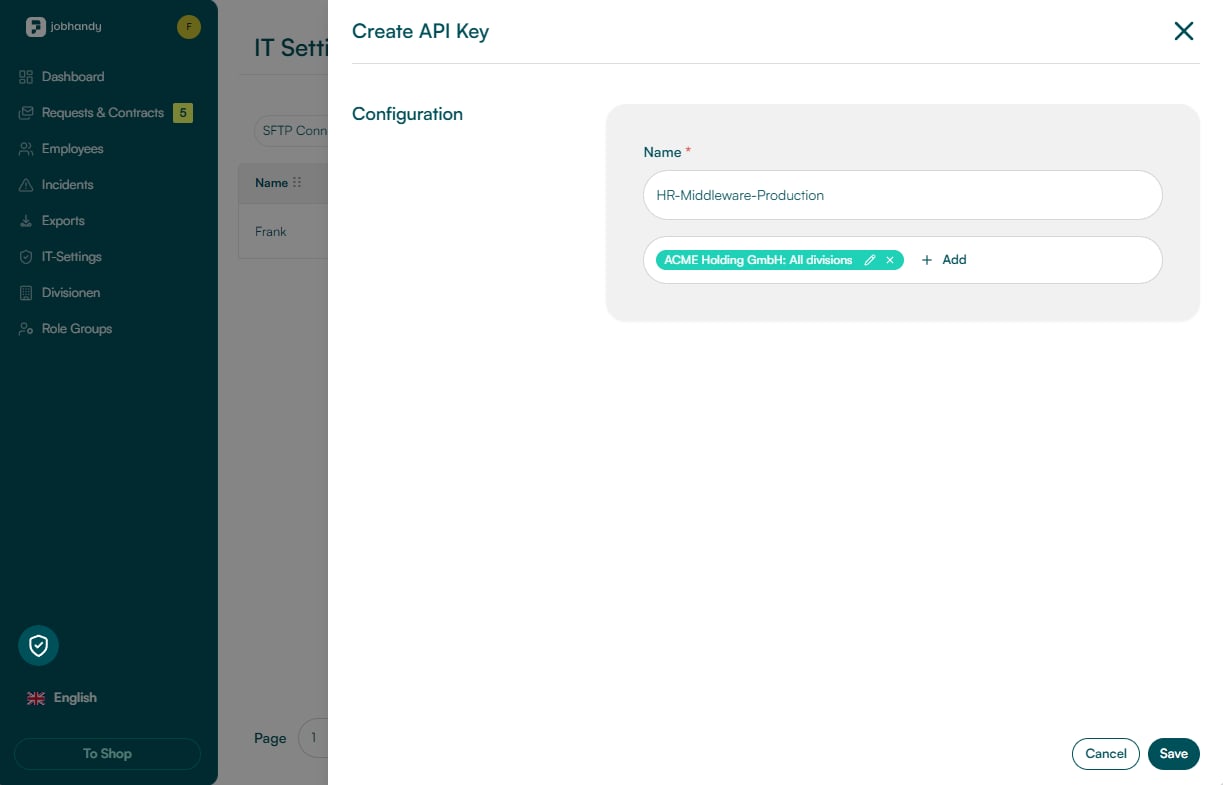
Understand scope selection
In the illustrated example, Select all applies the key to the complete company structure of the selected organization.
Click Add to apply the selected scope and then Save to create the key.
Copy and store the generated key
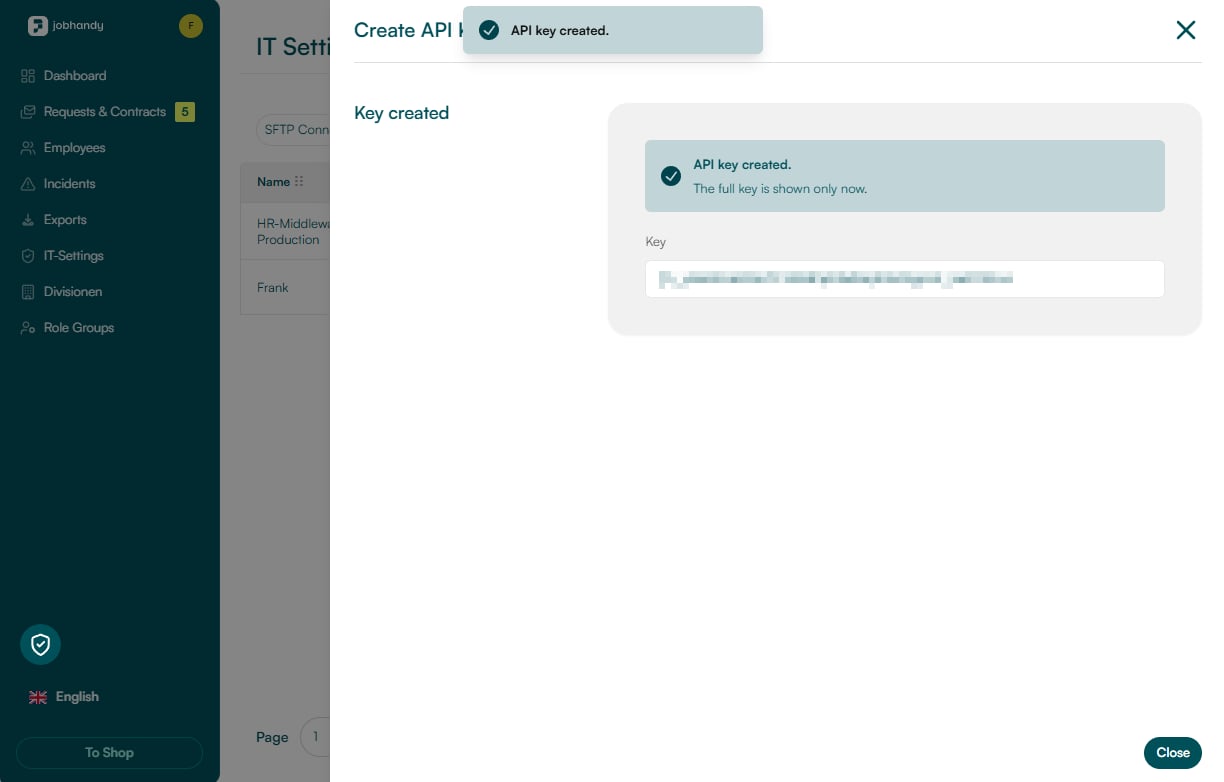
JobHandy displays the complete credential immediately after creation. The key is active and can be used in theX-API-Key request header.
Verify the active key
After closing the dialog, the key appears with status ACTIVE. The Deactivate action revokes the credential without deleting it.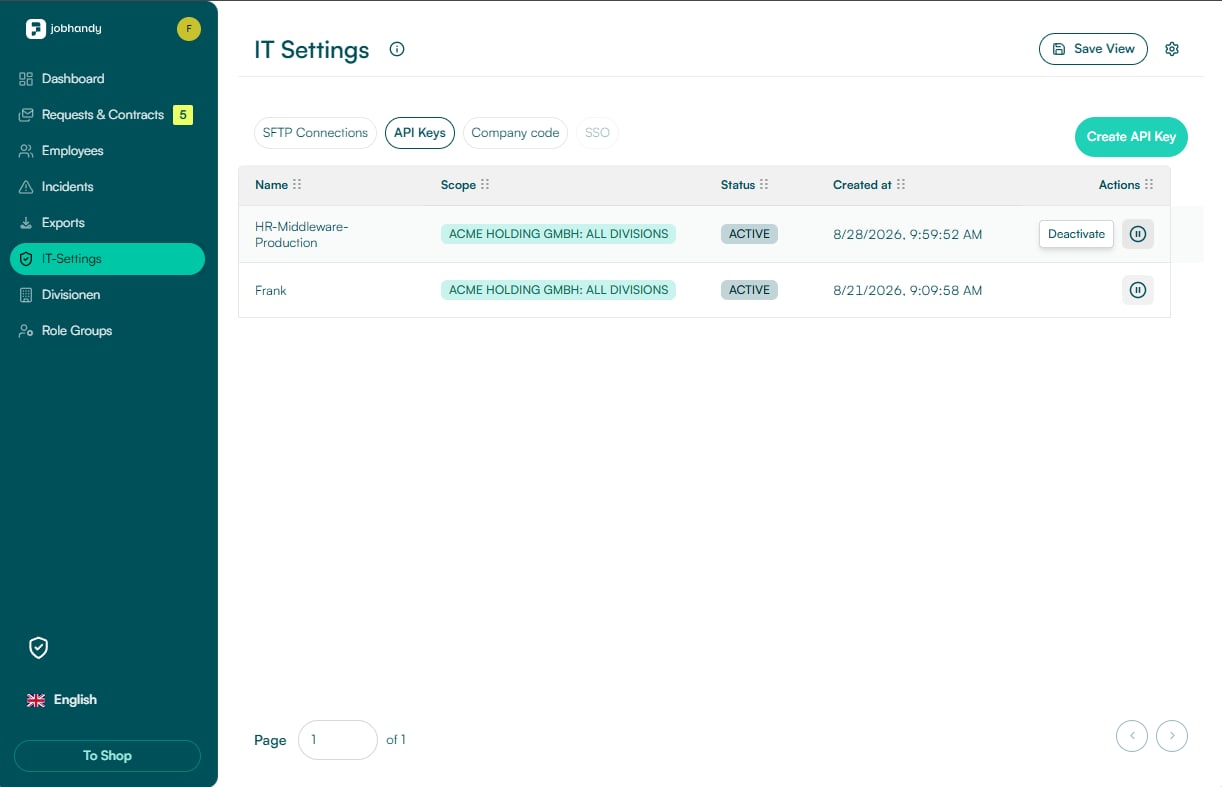
Deactivate, reactivate, or delete
Click Deactivate when access must be revoked. Deactivation takes effect for subsequent protected requests. After deactivation, the key is shown with status INACTIVE and can be reactivated or deleted.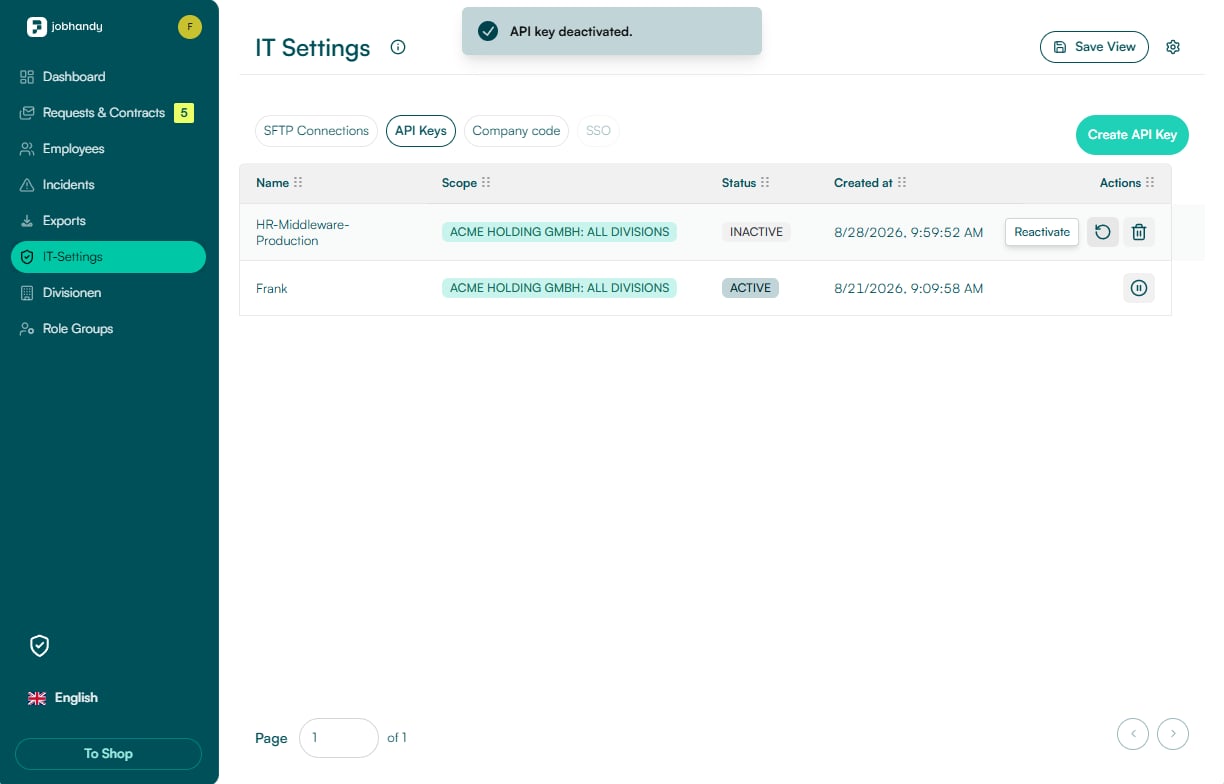
Rotate a key without downtime
Do not deactivate the old key until the replacement has completed a successful protected request in every active integration instance.Detailed rotation procedure
Use the operational runbook for preparation, rollout, verification, rollback, and retirement.